ColorTone
게임에서 보면 블러처리를 하거나 흑백 처리를 하거나 등 여러가지 화면을 후처리 하여 여러가지 효과를 내준다.
이 효과를 구현해보자
ColorToneDemo
ColorTone.h
	RenderTarget* renderTarget;
	DepthStencil* depthStencil;
	Viewport* viewport;
	Render2D* render2D;
	PostEffect* postEffect;
이것들을 추가해주자
ColorTone.cpp
void ColorToneDemo::Initialize()
{
	float width = D3D::Width(), height = D3D::Height();

	renderTarget = new RenderTarget((UINT)width, (UINT)height);
	depthStencil = new DepthStencil((UINT)width, (UINT)height);
	viewport = new Viewport(D3D::Width(), D3D::Height());

	render2D = new Render2D();
	render2D->GetTransform()->Scale(355.0f, 200.0f, 1);
	render2D->GetTransform()->Position(200.0f ,150.0f , 0);
	render2D->SRV(renderTarget->SRV());

	postEffect = new PostEffect(L"100_ColorTone.fxo");
	postEffect->SRV(renderTarget->SRV());
}

void ColorToneDemo::PreRender()
{
	renderTarget->PreRender(depthStencil);
	viewport->RSSetViewport();
	.
	.
	.
}

void ColorToneDemo::PostRender()
{
	postEffect->Render();
	render2D->Render();
}
필요한 것들을 생성해주고 초기화 해준다. 그런뒤 랜더링을 해준다.
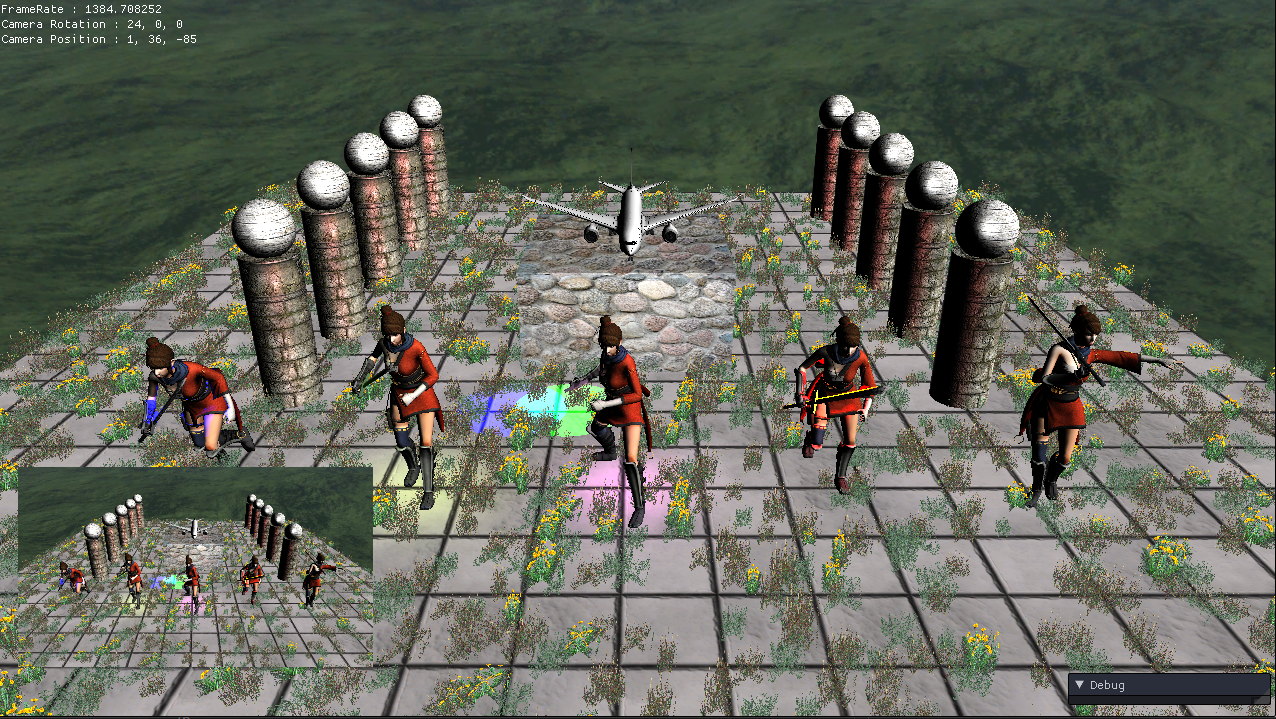
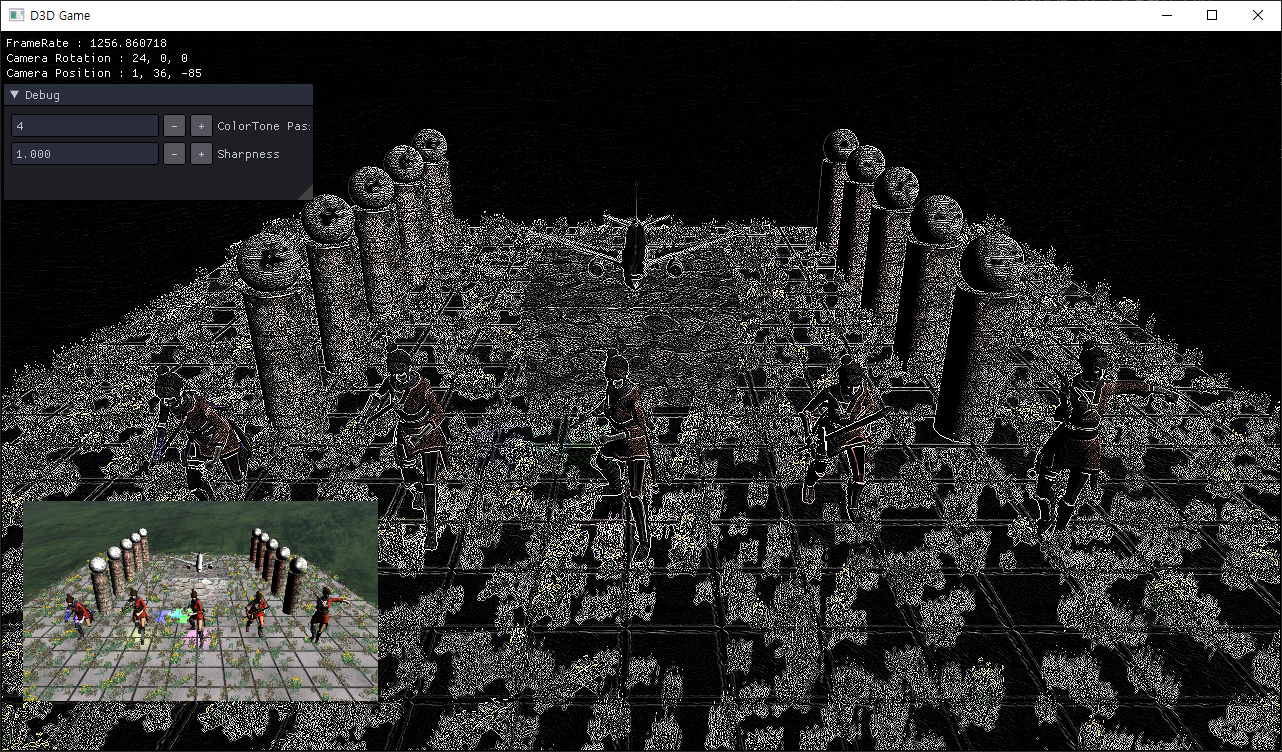
왼쪽 아래는 이펙트를 적용시키지 않은 화면이다.
Shader
100_ColorTone.fx
#include "00_Global.fx"
#include "00_Light.fx"
float2 PixelSize;
struct VertexOutput
{
float4 Position : SV_Position;
float2 Uv : UV;
};
VertexOutput VS(float4 Position : Position)
{
VertexOutput output;
output.Position = Position;
output.Uv.x = Position.x * 0.5f + 0.5f;
output.Uv.y = -Position.y * 0.5f + 0.5f;
return output;
}
float4 PS_Diffuse(VertexOutput input) : SV_Target
{
return DiffuseMap.Sample(LinearSampler, input.Uv);
}
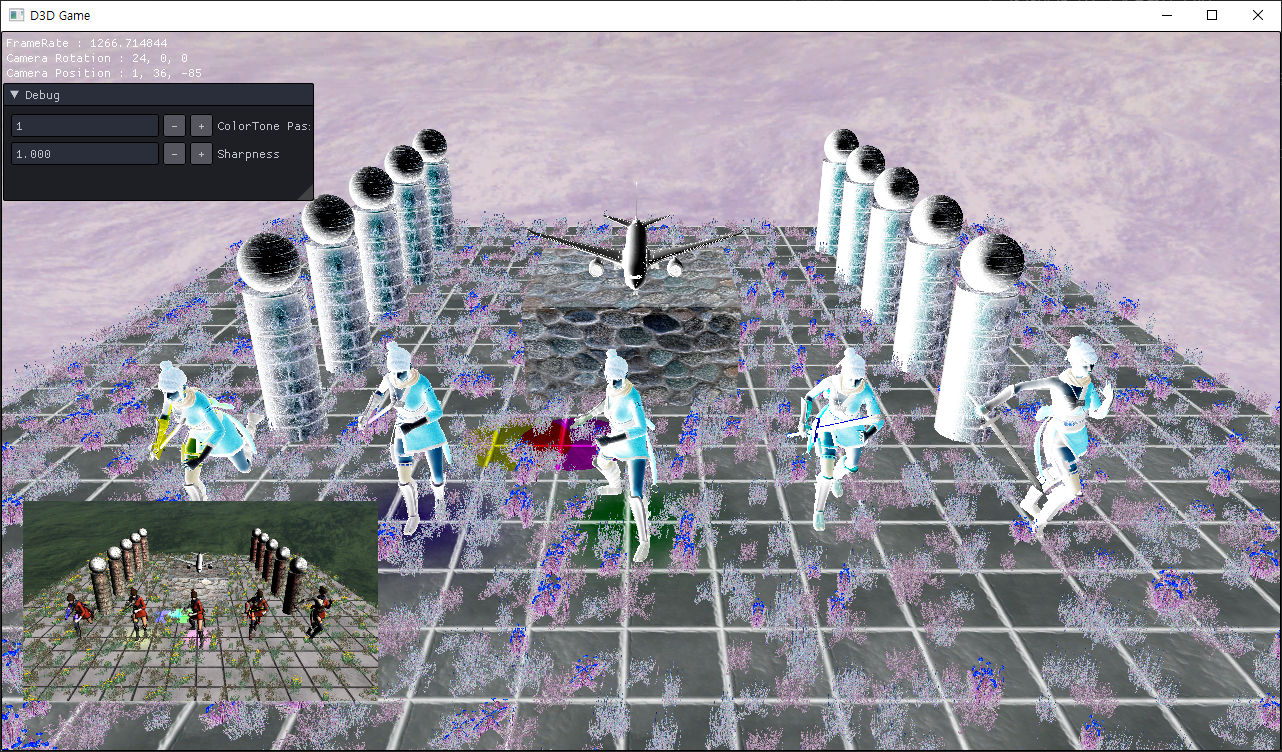
float4 PS_Inverse(VertexOutput input) : SV_Target
{
return float4(1.0f - DiffuseMap.Sample(LinearSampler, input.Uv).rgb, 1.0f);
}
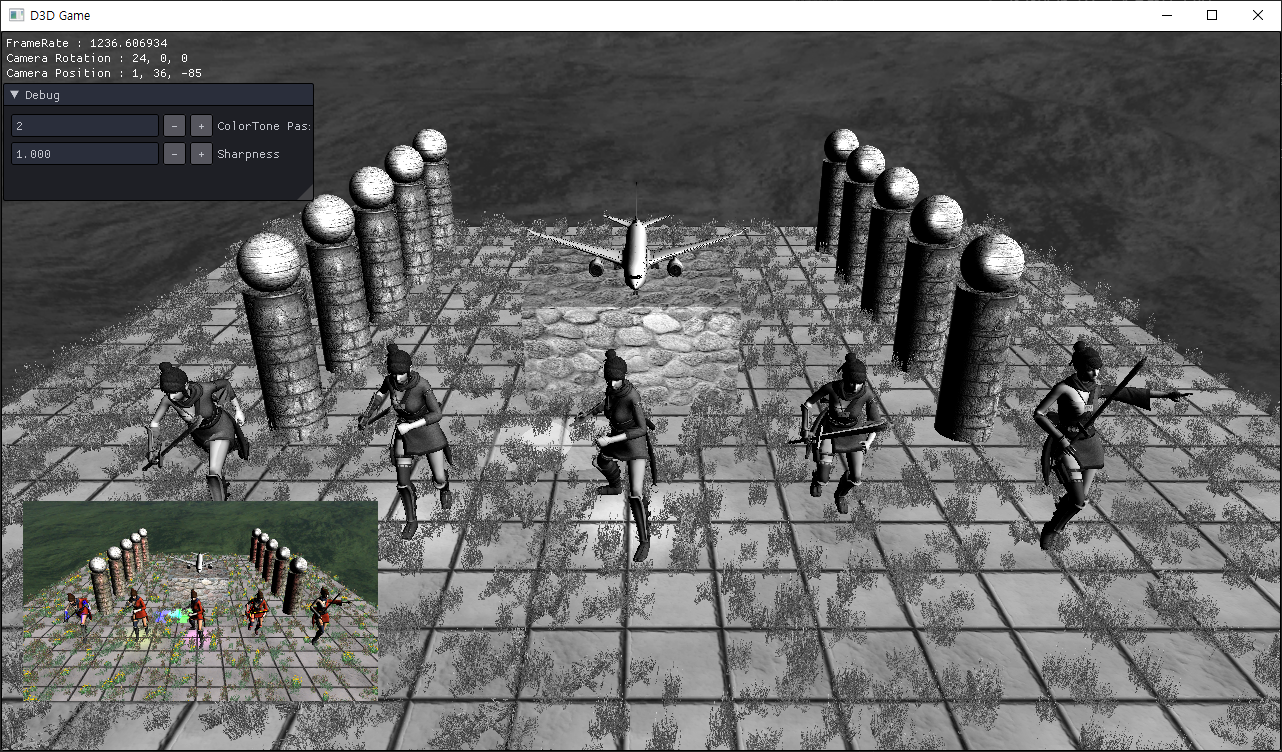
float4 PS_GrayScale(VertexOutput input) : SV_Target
{
float3 currentColor = DiffuseMap.Sample(LinearSampler, input.Uv).rgb;
float average = (currentColor.r + currentColor.g + currentColor.b) / 3;
return float4(average, average, average, 1.0f);
}
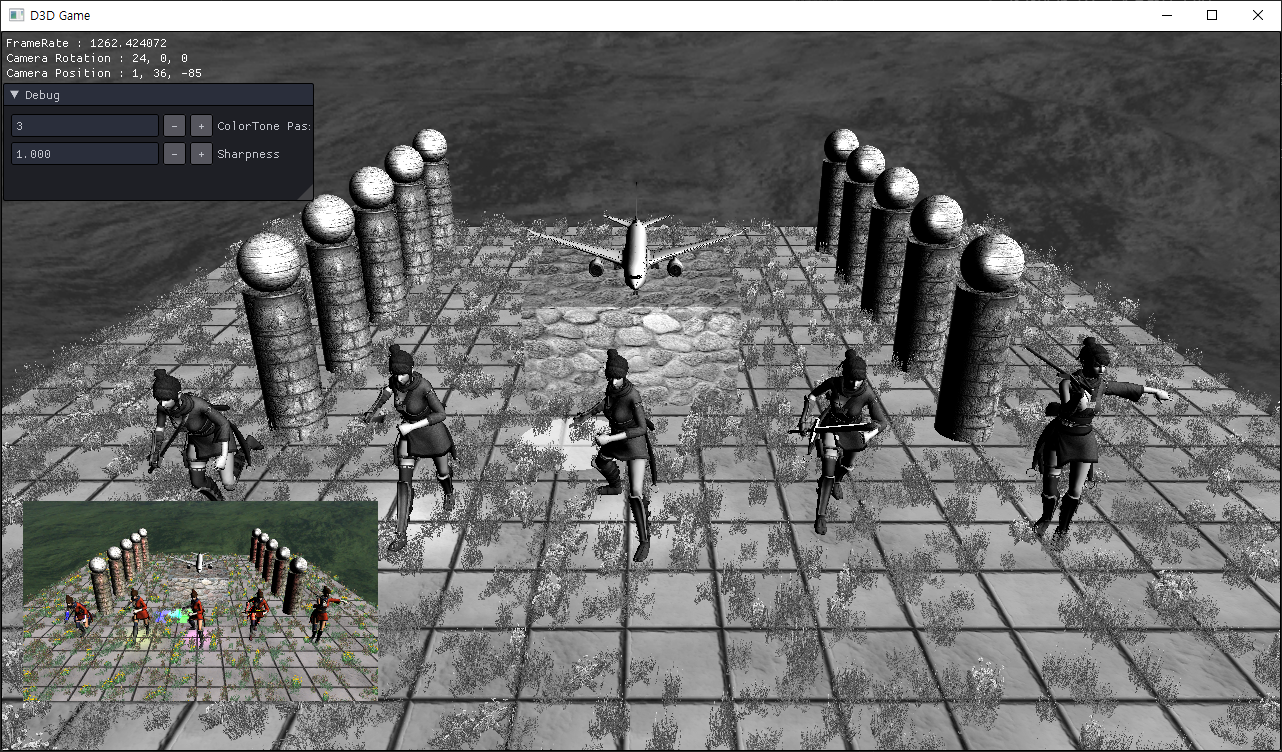
float4 PS_GrayScale2(VertexOutput input) : SV_Target
{
float3 currentColor = DiffuseMap.Sample(LinearSampler, input.Uv).rgb;
float3 grayScale = float3(0.2627f, 0.6780f, 0.0593f);
float average = dot(currentColor.rgb, grayScale);
return float4(average, average, average, 1.0f);
}
float Sharpness = 0;
float4 PS_Sharpness(VertexOutput input) : SV_Target
{
float4 center = DiffuseMap.Sample(LinearSampler, input.Uv);
float4 top = DiffuseMap.Sample(LinearSampler, input.Uv + float2(0, -PixelSize.y));
float4 bottom = DiffuseMap.Sample(LinearSampler, input.Uv + float2(0, +PixelSize.y));
float4 left = DiffuseMap.Sample(LinearSampler, input.Uv + float2(-PixelSize.x, 0));
float4 right = DiffuseMap.Sample(LinearSampler, input.Uv + float2(PixelSize.x, 0));
float edge = center * 4 - top - bottom - left - right;
return (center + Sharpness) * edge;
}
technique11 T0
{
P_VP(P0, VS, PS_Diffuse)
P_VP(P1, VS, PS_Inverse)
P_VP(P2, VS, PS_GrayScale)
P_VP(P3, VS, PS_GrayScale2)
P_VP(P4, VS, PS_Sharpness)
P_VP(P5, VS, PS_NoneSharpness)
}
- PS_Inverse
- 1에 원래 색을 빼서 반전을 시킴
- PS_GrayScale
- 각 색의 평균을 구해 흑백으로 만듦
- PS_GrayScale2
- 생물학적으로 눈에 들어오는 색의 가중치를 곱해 흑백으로 만듦(좀 더 자연스러움)
- PS_Sharpness
- 외각선을 선명하게 만들고 주변의 색들을 섞어서 비슷하게 만듦
글리치 쉐이더 파일 있어서 적용하려 했지만 실패!! 다음에 해봐야지